4 Simple Tips for Mixing Metal Finishes
When it comes to choosing metal finishes for something like light fixtures, bathroom fixtures, or even cabinet hardware, it can be tempting to just play it safe by sticking to one finish for all elements in the room. It keeps things simple, you won’t have to dedicate too much time or effort, and you know that at the end of the day it will most likely end up looking just fine.
But if you the type of person who liked to play it safe, and were okay living in a space that looked just fine, you wouldn’t be reading this particularly specific post on an interior design blog, right? Right.
Luckily, there are a few simple ways you can give the metal selections in your home a more special, curated look — and we’re going to share them with you!
1. Cast the Leading Role First
Similar to some tips we’ve mentioned in previous posts about coordinating tile, mixing prints and patterns, or combining different décor styles, when you’re mingling metal finishes in a single space, it’s important to let only one of them be the star of the show.
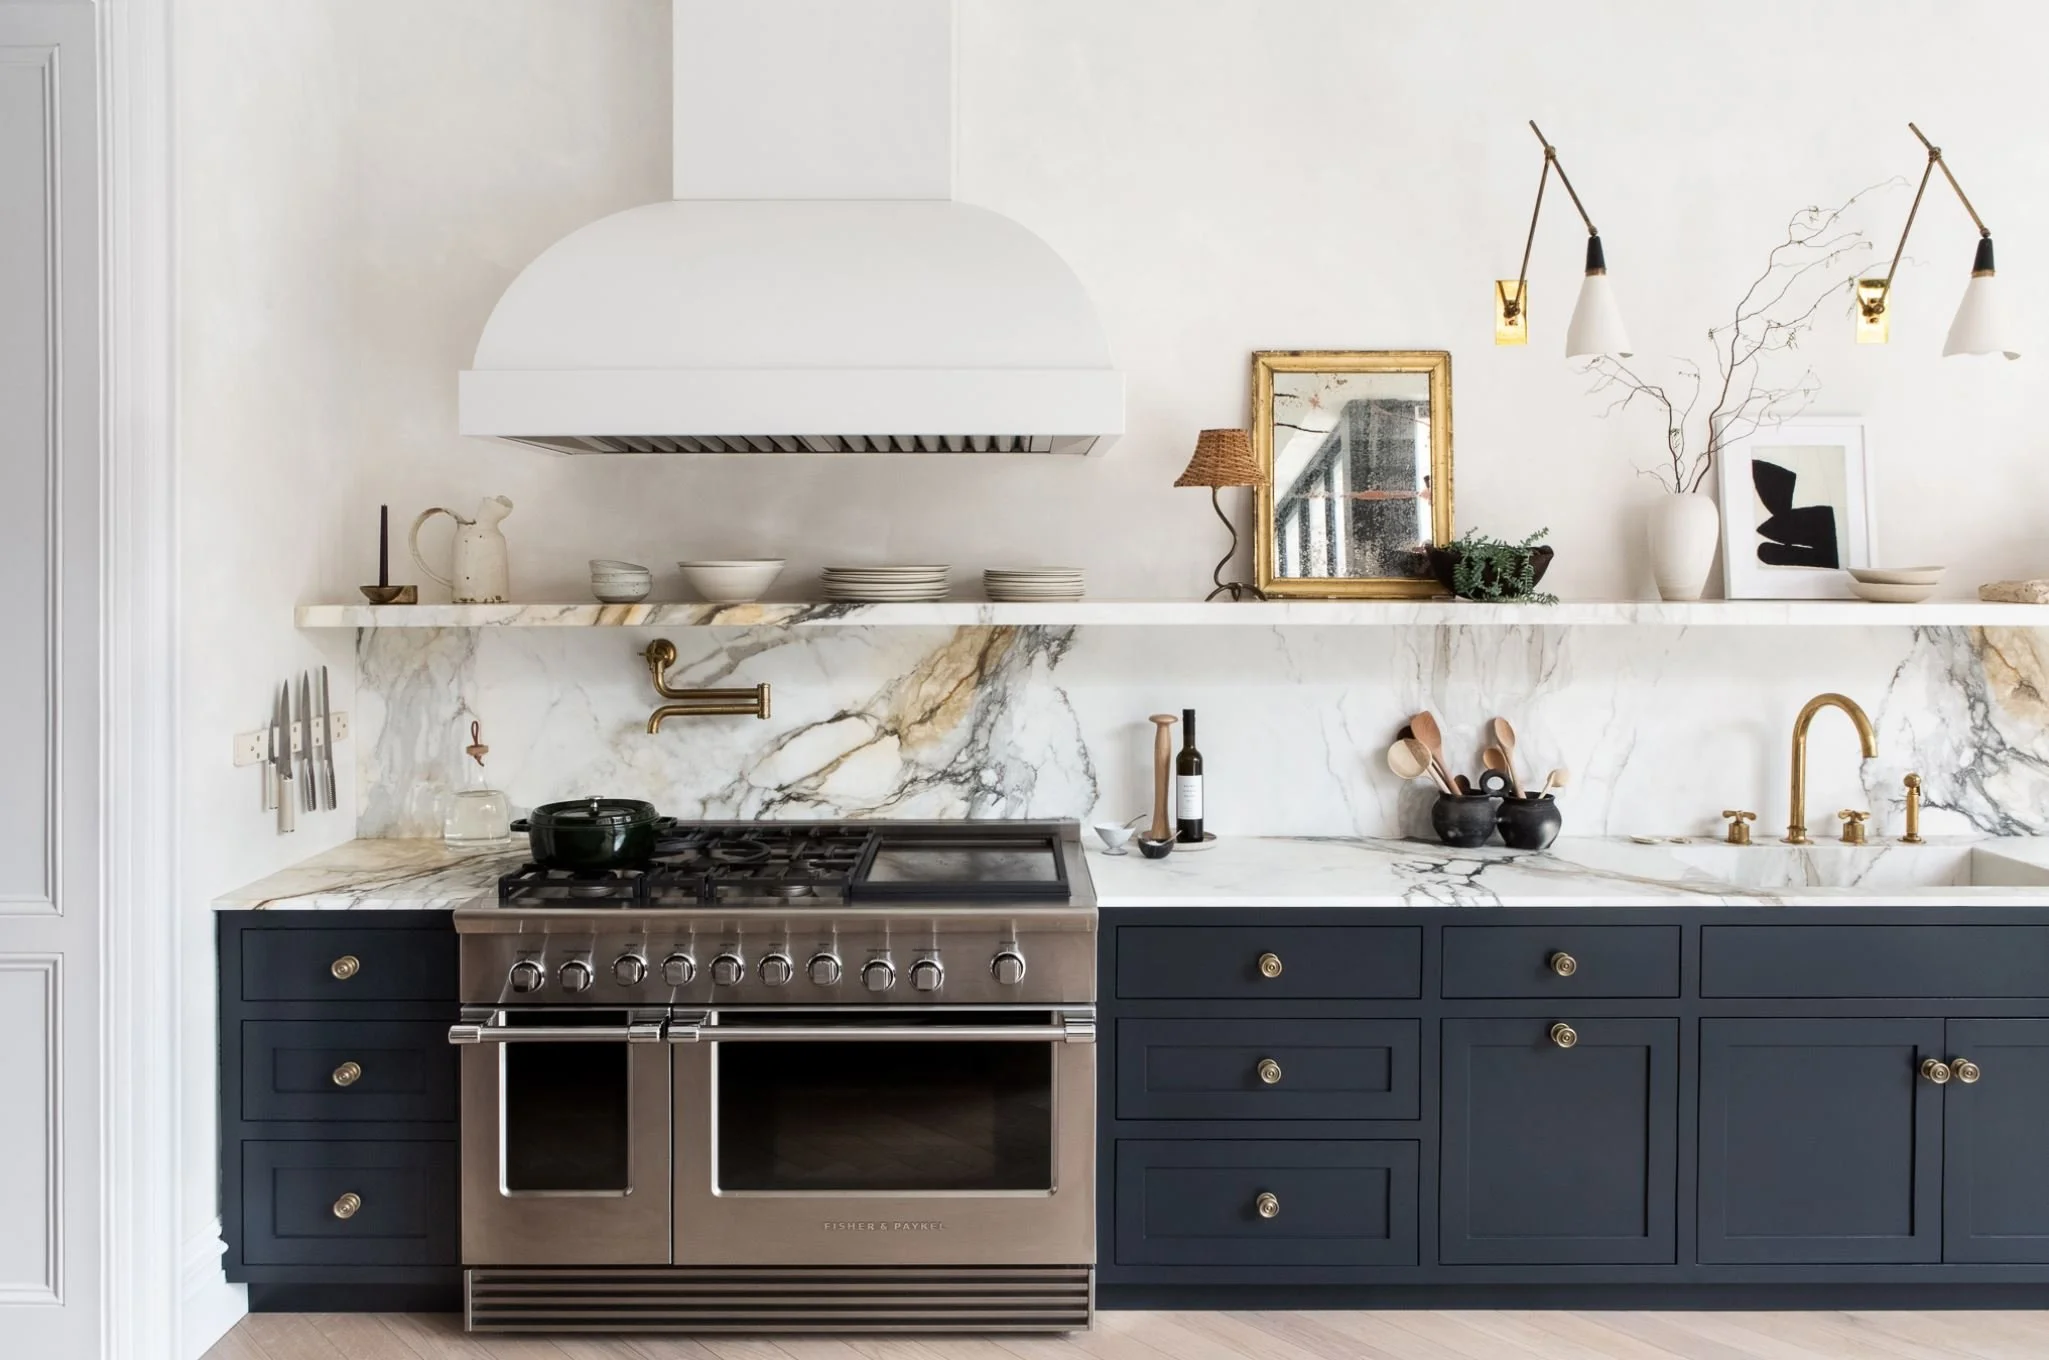
To achieve this, identify which metallic element will carry the most visual weight in the room. For example, in a bathroom it might be the shower and tub fixtures, while in a large kitchen it might be the cabinet hardware or range hood. In a smaller scale hallway or living space, it’s most likely the lighting fixtures.
By creating this sort of visual hierarchy within the room, it helps your decisions feel intentional, and prevents the overall design from looking too busy or chaotic.
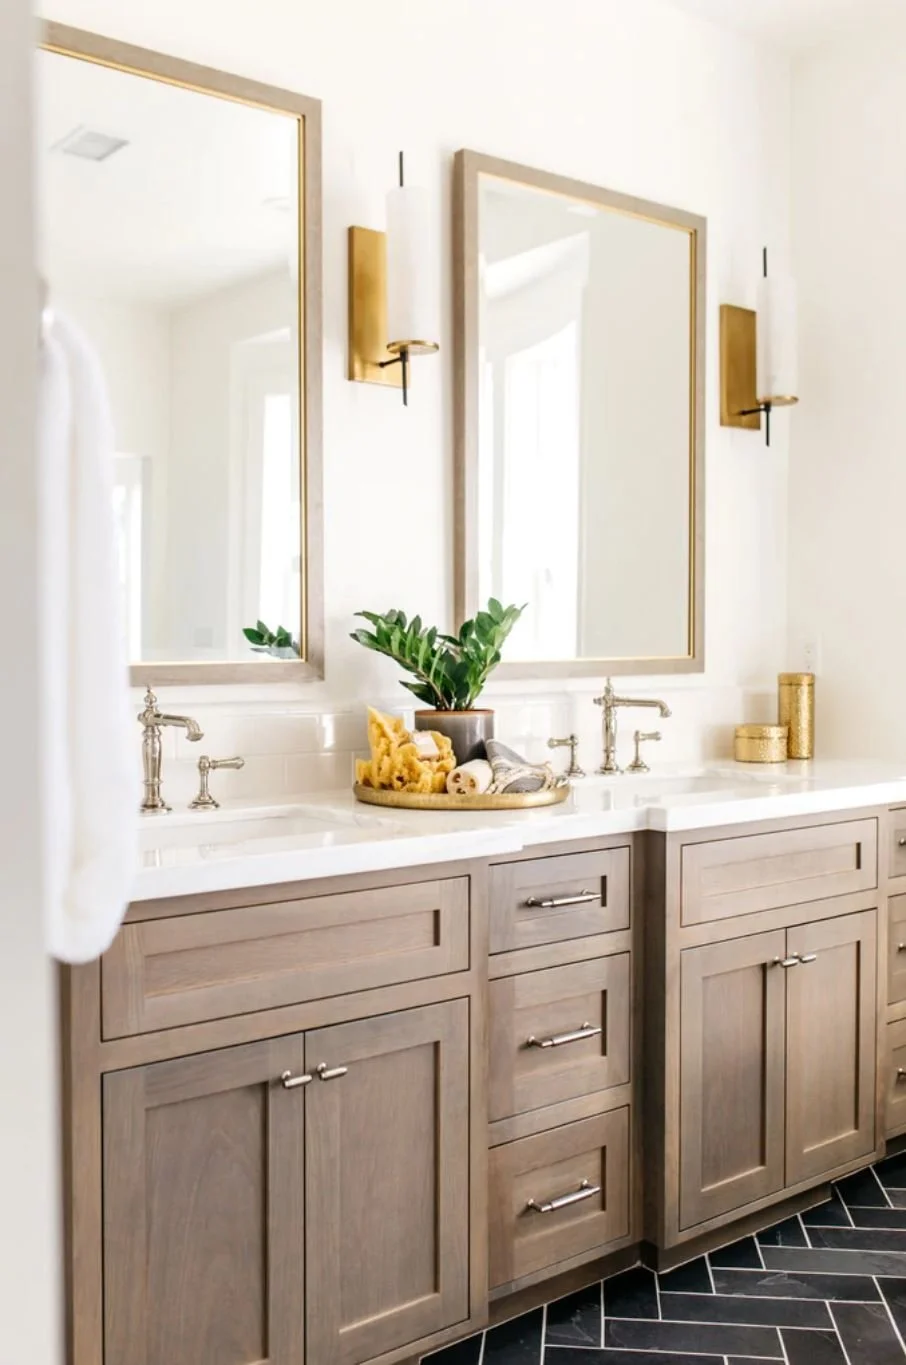
If you’re working in a space like a kitchen or bathroom with lots of metal elements, a safe way to mix finishes is by following the trusty “60/30/10 Rule” for interior design. Limit your space to only three metal finishes max. Then make roughly 60% of your metals the dominant tone, while 30% are a different complimentary tone, and just 10% are reserved for a special accent tone.
2. Group Metals by Height
Another technique for making mixed metal finishes feel more harmonious and deliberate in a space is to group certain finishes by height within a space. Arranging your like metals on the same visual plane will help avoid conflicting metals from landing side-by-side in a design.
To put this in practice, try using one metal finish for your lower cabinet hardware, and then pick another coordinating metal for your upper cabinet hardware. This approach would be particularly effective in design schemes with two-toned cabinet finishes!
Similarly, if you opt to use a particular metal finish on your light fixtures (upper visual plane), go with a different finish for your faucets and switch plates (middle visual plane).


3. Employ the Buddy System
To ensure there’s balance throughout the room in your metal selections, make sure you use each metal at least twice in the space! By giving each metal at least one other “buddy” it will illustrate that your selection was intentional, and also stop your eye from fixating on some single, lonely element like an elephant in the room.
It might sound like a challenge to make sure each metal is represented at least twice — particularly when you’re trying to stick to just 10% of your accent metal as we mentioned in tip #1 — but keep in mind that metals can show up in a space in lots of clever ways!
While your room might only have a need for one or two fixtures, you can make sure each metal has a buddy by incorporating coordinating metals into other design elements such as tile, furniture, drapery hardware, wallpaper, or your other art and décor items such as mirrors, picture frames, or a clock.
Get creative!

4. Think About Texture in Addition to Color
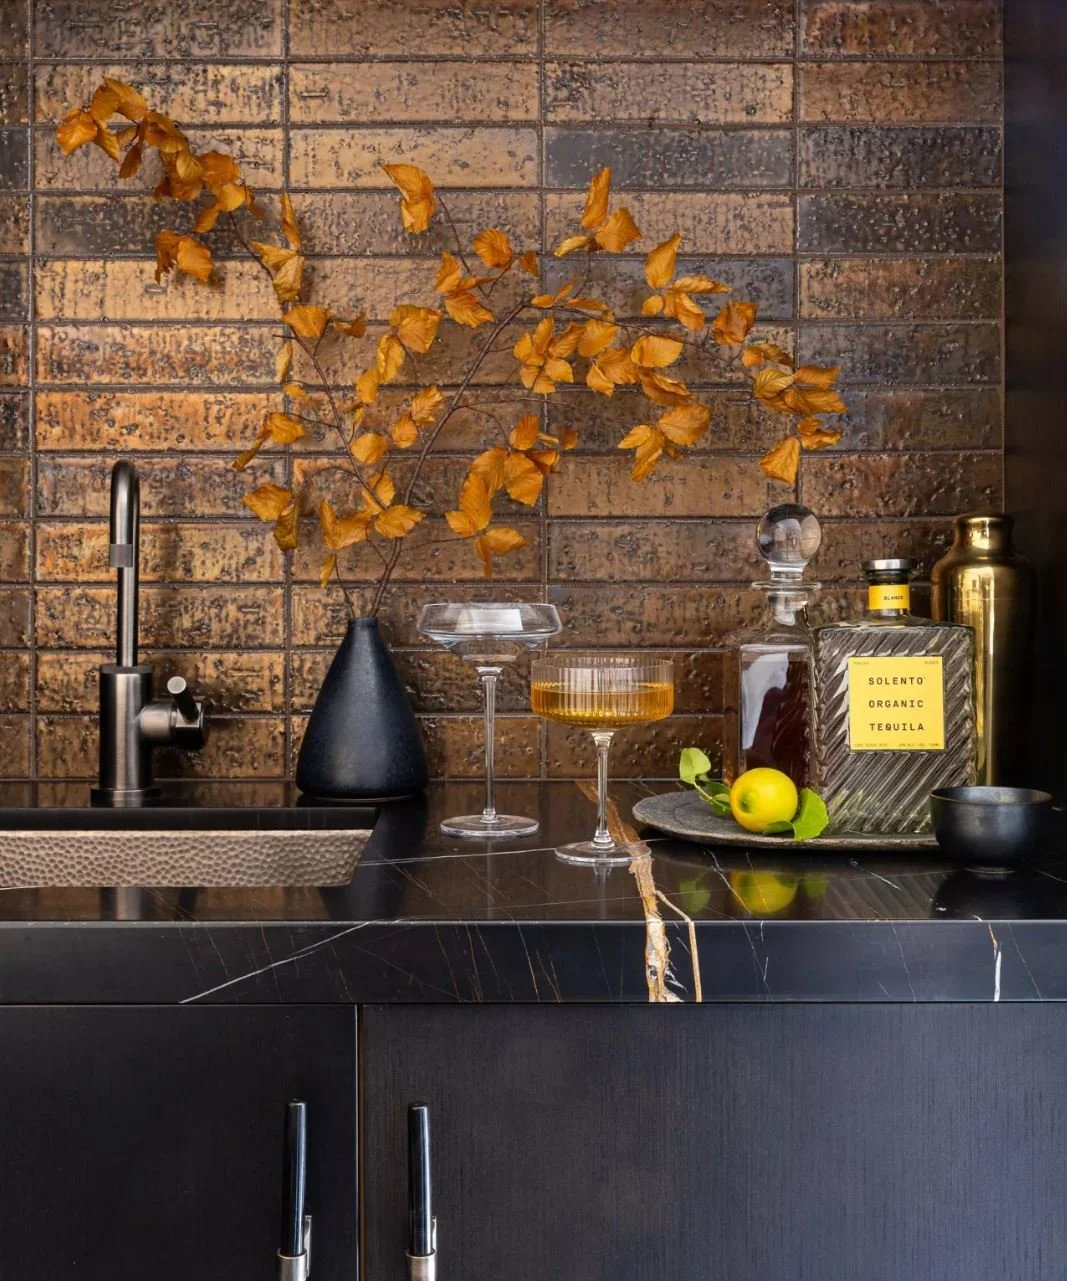
In addition to all of the different color tones of metal you can choose from, you can also have a lot of fun by combining different textures. Think about juxtaposing opposite texture finishes, such as:
polished next to matte or brushed
new next to antiqued or patinaed
smooth next to rustic or knurled
Combining a variety of metal textures will not only add visual interest to your design, but will result in a room that’s fun to touch, as well. Rooms are meant to be lived in and used, after all. Not just photographed for Instagram!
Finally (a little bonus tip), just remember to have fun with it. If there’s something you absolutely love, then you should of course find a way to include it in your design — even if it does “break the rules” a little bit.
We’ve said it before, and it bears repeating — the number one rule is to create a living space that brings YOU joy.
Interested in putting a few of these techniques into action, but need just a little more professional guidance before you get started?
Custom Interior Design packages from Studio 1049 are perfect for the savvy DIY-er who’s interested in a more hands-on approach for updating their furnishings and décor!